 Hello again, world. Guess who’s back with a brand new rap? Well, not me, I don’t rap. Ever. If you’ve been reading diligently, you’ll remember from a previous post, I said I did not know how to weld. Well, that is no longer applicable. My one flaw has been fixed; I have unlimited power at my disposal. TREMBLE WORLD…MUAHAHAHA!
Ehem.
Uh…sorry ‘bout that ladies and gentleman; I’ll try and control that side of myself a little better. What can I say, the Dark Side is seductive…Well now, how about I talk about some welding, like I said I would?
I hope you’ll remember that I am currently learning these things; if I make a few mistakes (one or fewer, hopefully), please don’t hold them against me. I only work here, folks.
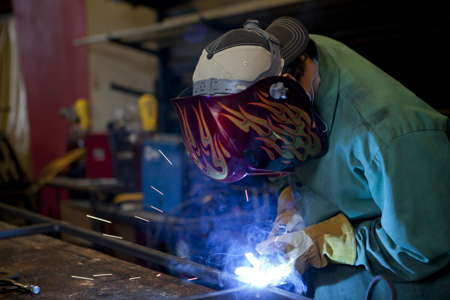
Welding is undoubtedly a difficult fine motor skill to learn, but it is a wonderful skill to have in this line of work. Before beginning to weld, there are items we need to find for use, like ear protection, a respirator (a sort of gas mask-type thing that filters the harmful particles or molecules out of the air you breathe), gloves, a jacket and a welding hood (the big black mask with the translucent window). Each has an exact safety purpose; the gloves and jacket counteract the extreme heat and the fire-starting capabilities of the welder, the hood lets you look at the weld without permanently scarring your eyes (welding throws metal particulates into the air which would severely damage unprotected eyes) and the correct respirator helps you breathe (by keeping these particulates out of your lungs).
So, now that we have our safety items, it’s time to move on to the welder itself. We follow a specific series of steps:
1. Plug in the welder and flip the on/off switch to “on,” (you’d be surprised how often this ubiquitous step gets forgotten).
2. Turn on the gas cylinder.
3. Set your pressure.
4. Set the voltage and speed of the welder.
These steps help ensure that we make the correct weld, and should be followed before using the machine every time and for every material.
 I guess I forgot to mention that there are different types of welders, like the MIG (metal inert gas) welder or TIG (tungsten inert gas) welder. I learned on the MIG, which has a spool of copper wire, or electrode, inside that travels through the electric arc and fuses with the base metal to make the weld. It’s sort of like a high-tech version of the glue in a hot glue gun.
The speed in Step 4 determines the rate at which the wire leaves the gun, and the voltage affects the heat of the wire coming out and the ease with which it’ll create an arc and either weld the material or cut through it.
But of course, no weld can be started without completing the arc, or circuit that the voltage will go through. Otherwise, no sparks will be made and no welding will be done. So, we attach a ground clip to complete that circuit and we weld! Hooray!
You know, once I learned I was to weld, I wondered what kinds of different welding forms and unique techniques I would learn to attach metal. Well, I’ve only seen a few kinds, so far. The (sort-of) easy, basic welding method is a circular motion, which uses a pool of molten very, very hot metal (the weld metal) around the seam to fuse the two adjacent pieces of base metal together.
However, not every seam can be closed that way. Say you’ve made a jig but the pieces you are required to weld together are not flush and there is a gap. Well, to bridge that gap, you weld in a straight, slow motion across that gap, adding weld metal over the seam, fusing the pieces of metal together.
Most of your welding will be short, uncontrolled (totally kidding, always controlled) arcs or welds. This is to preserve the rigidity of the steel. Hot steel is more malleable than cool steel, so it’s easy to affect the integrity of the base metal. Also, you can easily cut right through the steel if you spend too much time welding one spot or use too much voltage. Welding’s great, but I don’t exactly want to make more work for myself…
Now that our weld is made and everything is connected; the time has come to shut the welder off. Remember all those steps we just learned? Good, now reverse them.
4. Turn your voltage and speed to under 1 (basically to zero).
3. Turn off the gas tank, clearing all the leftover gas in the line right as you’re releasing the pressure.
2. Turn off the system.
1. Unplug it.
Sure makes it sound easy, right?
Well, more often than not, someone forgets to clear the one gas hose on the machine, which keeps pressure on the system and could cause weak points to fail. Very shameful indeed. But you know, it happens. Just try to stop it from happening.
Well, I’ve already rambled far too much, so, until next time, be safe, live life and always remember Alderaan.
