I’m going to pick up where I left off last time, so if you missed the last entry I’ll let you go back and read it to catch up. In fact, I need to refresh my own memory … hold on …. got it.
Have you read it? Good.
So now that we have all these wonderful, cut, routed and drilled out pieces of wood, it’s time to put this lumber together in shapes resembling scenery. We do this in different ways depending on a number of factors that include the thickness of the wood, what the wood is being attached to and the like. I should also point out that this project had a lot of steel to go along with the lumber.
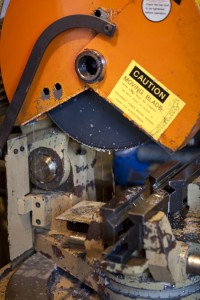
 We’ve already learned about cutting wood, but cutting steel is a different process. For this project I used a cold cut saw, which lubricates its blade while cutting to reduce friction and prevent sparks. This protects the steel being cut and the saw blade alike. Cutting steel is a slower process than cutting wood because, let’s be honest, you’re cutting metal; it’s much harder than wood.
After the steel is cut, we lay it out in a jig (remember that term? If not, see Carpentry Pt. 1). This keeps the pieces in place so they can be welded together. I do not know how to weld; that was a left to the Staff Carpenter/Metalworker (who is a ridiculously funny person). So, while he’s doing that, let’s go back to all that lumber lying around.
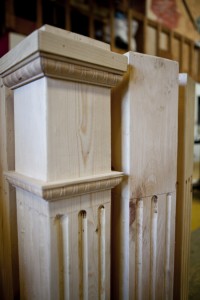
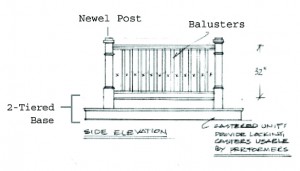
 All this lumber was for two distinct parts: a baluster railing and some newel posts. The railing required the drill press and the irksome newel posts required the routing.
The baluster railing was fairly straightforward. To make them, I took cut pieces of 2×4 that had been routed (in a different way from the newel posts) and built a base and a railing around them. The railing was a 7-foot piece of ripped lumber (remember that term?) and attached to the balusters through wooden dowels and wood glue. (If you don’t know what a dowel is, just look at one of your many pieces of IKEA furniture. They use a lot of wood dowels in their construction.)
 Making the base was a bit more complicated. Since it is two-tiered, it required even more ripped-down lumber. We needed three different widths of wood: 4, 2 ½ and 7/8 inches. We then put these together using wood glue and a pneumatic staple gun (I’m not sure if I explained pneumatic tools before but it just means they require air pressure to function).
Creating a base like this is what is called ‘finish’ carpentry (at least, I think it is… like I said, I’m just an intern), which means that a higher level of accuracy is needed and there is less room for error. The sides have to be flush with each other (meaning they have to be on the same level) so that you can’t see a difference. However, if they are visibly uneven, we can easily sand it down to keep the lines flush.
[End of Side 1. Flip to Side 2 for Continued Listening]

2 Thoughts on “Intern Insights: Carpentry Pt. 2”
View Comments